Cashflow History
To view the Cashflow History page, in the toolbar, under , click .
The table displays a record of all your previously created cashflows. Each row represents a saved cashflow record. By default,10 rows per page are displayed, you can customize the rows to be displayed per page from the dropdown at the bottom of the table.
Note: If there are no cashflows created, this table will be blank and you will see the message, No record of cashflows created. Create your cashflow first.
To make it easier for you to find a specific cashflow, you can filter the table. You can use more than one of these search methods at a time.
To locate a cashflow, in the search field, enter one or more sequential characters that are in the cashflow name, and then click the button.
Note: The characters that you enter are not context-sensitive, and can include spaces.
You can filter your cashflows based on the date column in the table. You can hover your mouse over the  information icon to view an explanation of the date filter.
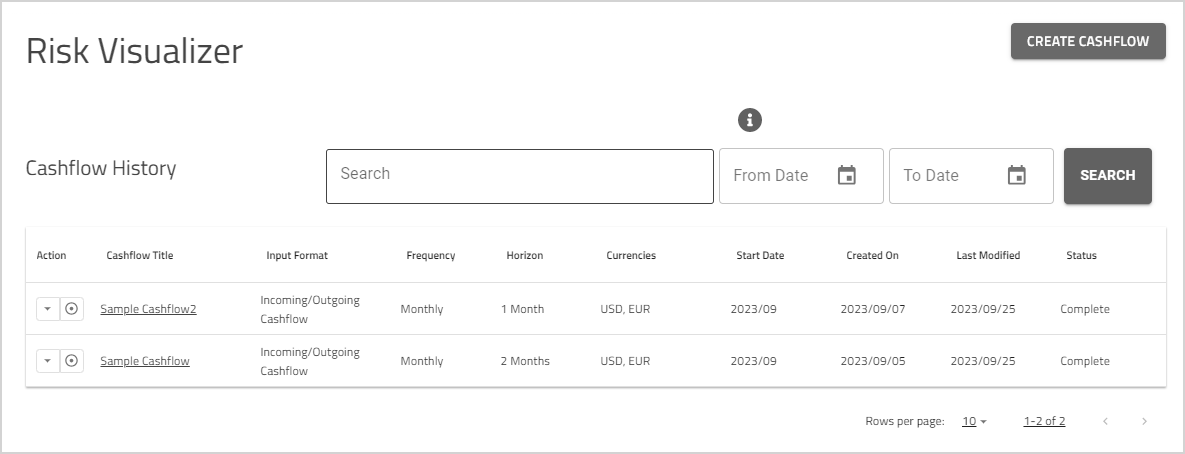
The cashflow history table displays information about the saved cashflows.
-
Action—List of user actions that can be performed on the cashflows. You can , , ,and view the for your cashflow. For more information see Action Menu.
-
Cashflow Title—The name of the cashflow. You can click the cashflow title to view the for your cashflow.
-
Input Format—The selected input method for the cashflow, Net Cashflow, or Incoming/Outgoing Cashflow.
-
Frequency—The selected frequency to enter the cashflow transaction information, Monthly or Weekly.
-
Horizon—The length of time set for the cashflow.
-
Currencies—The currencies selected for the cashflow.
-
Start Date— The date when the cashflow will start.
-
Created On—The date when the cashflow was created.
-
Last Modified—The date when the cashflow was last updated.
-
Status—The current cashflow status. See the cashflow status table below.
Cashflow Statuses
In the grid on the Cashflow History page, the column shows the current state of each cashflow. The possible statuses are:
| Status | Explanation |
|---|---|
| Complete |
The cashflow is completed.
|
| Incomplete |
The cashflow is incomplete.
For information to complete the cashflow, see Review Summary. |
| Out of Date |
|
Action Menu
You can , , , or view the for the saved cashflow risk from the column. To view the menu, click the  on the left in the column.
| Action | Explanation |
|---|---|
| Exposure Summary |
Click to view the for the completed cashflow. This option can also be accessed either by clicking the |
| Export (.csv) | Click Export (.csv) to export the cashflow as .csv.The data is saved in a .csv file. |
| Edit | Click to edit the saved cashflow. You'll be redirected to the Enter Cashflow Transactions Note:This option is disabled for cashflows with status. |
| Delete | Click to delete any of the created cashflows. A confirmation dialog appears that asks you to confirm that you want to delete the cashflow. Click to confirm the deletion. Important: Deleted cashflows cannot be recovered. |
 button in the Action column or the cashflow name in the
 To create a new cashflow, click . Proceed to the section Create Cashflow.
Note: This product is only intended for clients of a Corpay Cross-Border entity; only some jurisdictions are in scope, as approved by Corpay.